Saturday, November 20, 2010

Okay after a long day of running around and errands...its time to treat yourself to a great dinner! This recipe is sure to deliver flavor and enjoyment! Enjoy!

This is seared pork chops with marinated tomatoes and fennel with capers and lemon...its yum!

The recipe is from Giada De Laurentiis: Pork Chops with Fennel and Capers..

Ingredients

  • 1/4 cup olive oil
  • 4 boneless (2-inch-thick) pork chops (about 2 pounds total)
  • 3/4 teaspoon salt, plus more for seasoning meat
  • 3/4 teaspoon freshly ground black pepper, plus more for seasoning meat
  • 2 fennel bulbs with fronds, thinly sliced (about 8 ounces or 2 cups)
  • 2 large shallots, thinly sliced
  • 1/3 cup chopped fresh flat-leaf parsley, plus 1/3 cup
  • 1/2 cup white wine
  • 1 (28-ounce) can diced tomatoes, with their juices
  • 1/2 lemon, zested
  • 2 tablespoons capers

Directions

In a large, heavy skillet heat the olive oil over high heat. Season the pork chops with salt and pepper. Add the pork to the pan and brown on both sides, about 4 minutes each side. Remove the pork from the pan, cover loosely with foil, and set aside.

Add the fennel, shallots, and 1/3 cup parsley to the pan and cook over medium heat until beginning to brown, about 5 minutes. Add the wine. Using a wooden spoon, scrape the brown bits off the bottom of the pan. Add the tomatoes and stir. Add the pork back into the pan, nestling the chops between the fennel and tomatoes so they are mostly submerged in the pan juices. Cook until the fennel is tender and the pork is done, about 12 to 15 minutes.

Place the pork on a serving dish. To finish the sauce, add the lemon zest, remaining 1/3 cup parsley, capers, and 3/4 teaspoon each salt and pepper. Stir to combine. Spoon over the pork chops and serve immediately.


mess or art? Isn't it about seeking the order out of chaos?

So after a long day of work, I was walking by the sink and I saw this waiting for me. Some would think of great..another mess that I didn't see and now have to clean up before a meeting. Thats how I saw it as I was grabbing cleaning supplies and running around like a crazy person, only thinking about making tea before my meeting..until I just stopped for a second..took a couple of deep breaths and just noticed how fabulous it was. Truly art is all around us...we need to make it our jobs to find it..to see art and beauty everywhere we can..other wise, what is the point of rushing through? :) Amy

Sunday, March 14, 2010

I love finding old jars for extra serving spoons, croutons, raisons, and other treats. I usually find them for a dollar or less at thrift stores. They make great gifts filled with biscotti and cookies too! :)
My job has been particularly rewarding lately. The kids are so creative and we are all waking up to the colors of spring in our yards, parks, and artwork! First graders rock!
This is really too cute! I have them displayed in various colors all over the hallway...and they look great!
Some students thought of their own homes, apartments, and communities. Others imagined places they have traveled or want to travel to. Still others were the sole architects of city-scapes yet to be created!
Love this...this was half off of the asking price at unique. I paid under 30 for it. Its perfect for the guest room and maybe one day a nursery chair. The caning is immaculate condition and so is the stain for that matter. However I think it will be a dark mahogany in the future! :O love it!

Thursday, March 11, 2010

We should play the game what doesn't belong! Yes..your right..the bright green spring juice. Its actually cucumber juice and despite my best efforts to convince Janelle on the phone that it is so incredible while I was preparing it...it does leave much to the imagination. I don't think she bought it! It is delish though....we served it with very very spicy Moroccan inspired chicken and various salsa style dips. It refreshes and cools the palette. And its really easy to make...the key is not to boil the skin...put that directly into the blender otherwise you get a dark green that is muddy and most unappealing! :) A

To make the juice: Peel one cucumber and put the peel in a blender. Boil one cup sugar to 1 and half cups water and add the chopped up flesh of the cucumber. Boil 10-15 minutes to infuse your simple syrup. Poor it hot into the blender. Cover blender with a towel and lid and blend. Poor the a sieve and put in the fridge to cool. Serve with just a little ice and mint. :) YUM!!!
I am using an antique baby food plate to serve as a catch all in the kitchen for all the stuff I need and tend to just keep on the counter. Its working...need to look open mindedly at the whole house in terms of inefficiencies...speaking of.........
I am finding that "wasted space" is all over my house....lots of places to re-tool and re-think their use. Perhaps this dog is a simple reminder of spring cleaning and re-tooling.
While this is not true...I am very very talkative most days...I appreciate the serenity of this gift from a student. Perhaps there are reminders everywhere to stop for just a minute and enjoy what we have been given...all the opportunities around us to be glorious and enjoy the simple and the complex (right Luchian..Mr. complexity.)
Now...Ms. Mode...is my get it together note. I read this note pinned to my desk note board everytime I need reminders to just get out there and give it my all for seven hours straight and do it with flare and fun. If I am feeling drained....I take five with a diet coke and this note and I feel much better...almost as if I want to jump (armless-ly) over trees and gigantic flowers and just enjoy the moment. :) Have a good one! A

Tuesday, March 2, 2010

cozy-spaces-couches-l-COASTAL+LIVING.jpg


I love this idea from (my rambalings) this is so cute to have a fun nook incorporated right in to the living room. Its like saying..we are not denying we have kids in a dog up there..they just need their own little nook. Very cute built in..


via Haute Design.png


I wish I was bold enough to use this pea soup color and chartreuse blend. Chartreuse is my favorite color (second favorite actually) Its gorgeous...The key seems to be the white running through. Go to dailybitsofbeauty.com for more fun color ideas!


painting-chair_300.jpg


I love this idea from writersflock.com. Its a great idea to inlay cork or spray paint chalkboard paint to an old divider if its being used in an office or kids creative space nook. Fun!!!! Cork is so inexpensive from hardware stores its like 4.99 a yard! This is do-able!


Keys.jpg


A friend and I went junking a while back and she found old keys just like these. There were tons of them. A collector had passed it seemed. So she passed them buy and so did I, claiming we had no idea what to do with them! This is the reason for this blog....to re-think, re-use, re-decorate in new concept. After I while I thought how cute they could have been on a Christmas tree with red and silver ribbons! They a secret garden magic that says Christmas to me. :) I now vow..if something really cool...and seemingly un-useful is being sold for just a few dollars...I am going to buy it and try to reinvent in a fun new way! :) A

Monday, March 1, 2010

Necklace making from old garage sale beads...its fun when your hubby is snowboarding and your sick... ;(
You begin by looping three different strands of 10 beads to a main necklace with 28 beads...
This is what I mean..just looping and then connecting with sailor knots..
also its really nice to quilt..this one was made from just 2 by 2 inch squares that I save from everything that I can and put away for later. These patterns are muted by turning them inside out purposefully to create a softer look. Start saving your scraps in a specific size that you would like and then when the mood hits you..simply sew them together. For the back..I throughing bought a garage sale soft fleece blanket for fifty cents and washed in before using. The fleece was so soft it didn't need to be stuffed with batting.
Thrift stores also make great clothes purchases..see sweater above! Ha! :) A

Sunday, February 21, 2010

N140.jpg


I love this look found in dibor _co_ uk images. Use spray paint chalkboard (6.99) from homedepo to organize your produce! I am now going to scour the farmers market a few miles away for wooden bins..if not..unique should have them. :)


french-farmhouse1.jpg


This image from home hunts.net is of a French farmhouse. I love the pot-rack. Rustic, functional, simple. I like that. I am wondering if my future-brother-in-law could make one of these? :) I know my sis would love this. I am not a fan of the chairs..but love how a simple table cloth cleans things up a bit. Real stone dry stack fireplace and saltio tile floors makes a nice difference.


rustic_reuse_cabin.jpg


rustic_reuse_cabin.jpg


This is not my personal passion or dream...to re-use and recycle a whole home concept...but wow what a great art studio or workroom! Don't actually love it..but I like it.

3748622609.jpg


I added sugar, cinnamon, a small dash of ginger, and fresh peaches..this with a pie crust that is homemade or store bought is all you need. All this tart requires is that you roll out your pie crust into a vaguely circular shape roughly 14 inches or so across. Then, if you want to you can use a knife or a pastry tool to neaten up the edges into a more uniform circle but it's not necessary. You could probably even pat out the dough into the shape you require if you so desired. Slide the dough onto a rimmed cookie sheet (in case of filling leakage--don't want a smoking oven) and pile up the filling in the center leaving about a 2-3 inch border. Fold up the edges around the filling--the rougher the better! It'll look more authentically rustic that way and pop it in the oven to bake.
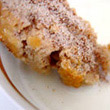
That's it!


Friday, February 19, 2010

3297365091_bdd9142c75.jpg


I love this kitchen..I have been searching google images for farm house fresh looks. I found this gorgeous bute on flicker. I am just have a deep love of a seemingly simple kitchen with updated stainless appliances! Who doesn't? :) TGIF! Amy


farmhouse-sink-de.jpg


I love this find from Elle magazine. I hope this sink is poured concrete, soapstone, marble, or granite...but its looking a little to faux something to be genuine. The size and shape is to die for though. Its a baby Jacuzzi or great place to scrub down farmers market finds!

5c1376a06ced.jpg


This one from the Decor Pad...is great. Perfect sink, pottery barn style rustica handles and hardware. And flashes of red accents to off set the black and white. However I think hardwoods in a kitchen are kind of a no no. I know our dogs drink water like heathens and dribble everywhere every five minutes. Grease splatter from fritters and stir fry also scare me with hardwoods. Its perhaps for the healthy eating dog-less couple!

Farmhouse-Kitchen.jpg


This image from Jill Tran's webpage is treat with the exposed brick!


farmhouse-kitchen-de-main_Full.jpg


I love the fresh paint and antiques in this kitchen! Check out the tike-chair in the middle ground! I love it..a little old and creepy perhaps but its kind of cute!

Thursday, February 18, 2010

Well...its another cold night! More snow Monday they say...I must say that we are ALL really enjoying the fires at night. I have actually started trimming sticks and wrapping old newspapers and tying with a bit of rope to make a really pretty fire to burn. It is such a silly thing to waste a few minutes on but I like our planter filled with the wrapped sticks and it brings me some sort of pleasure to see Mark building a fire these gorgeous wooden presents. I don't do this all the time..just when the recycling is too full of newspaper (we get things electronically.) Again its a huge waste of seven minutes...but its kind of like making a bed..its a pleasure to walk by and see it all done up ! :)
Its not all positivity, pretty fires, and fluffy snow around here! Sometimes we get bored and therefore...have to go thrifting at Unique, my favorite thrift store and then to GreatWall (an Asian speciality grocery)...to buy strange imported fruits! Its all and all a great day! This dragon fruit (about 1.30) was somewhat tasty. But its not as good as mangos, mango-steins, taro, litchi, and my absolute favorite "winter time snow discovery" rambutons! If you do nothing else over the weekend, I encourage you to seek out and eat a rambuton! Its wonderful! :) Amy
We will ever have spring again? Its hard to believe this poor ice covered bush in our yard will ever look like this again! : ()
This is the Sweetie's lock from the middle east..I love it. I have been wondering how we can use it in our everyday lives. Its just to pretty to put away...I will think that one over. Any ideas? I could be our future-teenagers lock for their locker..
The second batch of delicious Janelle biscotti has been taken out of the freezer (spent some time overnight in the fridge) and is ready for British style high tea! Thank you Janelle!!! Its so good with tea or hot coco. Here is a recipe from allrecipes.com that might inspire those of us who think its impossible (like me) to try and make it.

Before Baking

Biscotti can seem a little exotic, but they're just as easy to make at home as any other cookie. To begin:

  • Line your baking sheets with parchment paper.
  • Mix dough, adding "extras" of your choice. Common flavors found in biscotti are anise, orange, almond, chocolate and hazelnut. But try more exotic combinations such as dried cranberries and pistachios, lemon and poppy seeds, or ginger and macadamia nuts. Be as creative or traditional as you wish.
  • Form biscotti loaves as big or small as you like--create dainty little tea cookies or jumbo breakfast-sized coffee companions. Note: The dough can be sticky; try wetting your hands before forming the loaves.


Slicing Made Simple

After the first baking, the biscotti loaves should be firm and very lightly browned, but not hard.

  • Loaves are ready to cut when you can touch them without burning yourself.
  • Use a long serrated knife--especially if you have nuts or dried fruit in your biscotti. This kind of knife will allow you to slice neatly through the loaves without putting any pressure on them.
  • Slice on the diagonal for long biscotti or straight across for shorter ones.


The Crunch

Time for bake number two. The point of this second baking is to dry out the biscotti without browning them too much, so a low oven temperature and a slow baking time are key. For softer cookies, simply bake them for less time. For biscotti that can stand up to coffee-dipping, bake until they are as crunchy as you like.


Beautify Your Biscotti

Once the biscotti have cooled, you can decorate them if you wish. Try drizzling them with one or several kinds of melted chocolate, or dunking them in chocolate then rolling them in chopped nuts.

Cuddle in to the art of felting. Then if you take a dog-nap you can enjoy a home-made or semi-made felted quilt or blanket. It is truly a fun and easy easy craft. No sewing involved! Here is what suit101.com has to say about needle felting!

How to Needle Felt

Use a Dry Felting Technique to Add Embellishments to Projects

Jan 15, 2008 Kate Pullen

Using a felting needle is great way to add embellishments to sewing project. While it is a simple technique, a few key tips will help produce perfect results every time.

Needle felting is an ideal way to add embellishments to a variety of sewing projects. The process of needle felting bonds fabrics and textiles together. This means that a variety of unique textures and surface decoration can be achieved which is ideal for creative embroidery or other needlecraft projects.

How to Needle Felt by Hand

Little in the way of equipment is required to needle felt by hand.

  • Needles: The first thing to note about a felting needle is that it is long, barbed and extremely sharp. Therefore care needs to be taken when working to avoid injury. The process of holding and using a felting needle is very different to using a sewing needle. The felting needle punches through the fabric from top to bottom. Punching away with happy abandon is likely to end in a finger puncture or two, so this is a technique that requires concentration while learning the basics. Whether working with a single needle or a needle felt tool, the principle is the same and that is to push or punch the needle through layers of fiber or fabric. This means that it is important to do this on a surface which the needle can sink into. When picking a surface to work on it is important to make sure the whole barbed part of the needle can pass through the work. This ensures that the maximum quantity of fibers is dragged through the layers. The way the fibers are pulled through the layers can be seen in the photographs below (click on photograph to enlarge image).
  • Felting Pad: Special needle felting pads can be purchased; however, many needle felters use polystyrene blocks, upholstery foam or compressed foam. Experienced needle felters have their own special surface for working on. Some needle felters, for instance, use the heads of firm floor brushes as this gives the support to the work while allowing the needle to sink through the work.

Tip: Remember that unless carefully chosen, some "ad hoc" felting pads can end up also getting felted into the work. Therefore, avoid wads of fabric, old cushions or anything fibrous. When working on unfamiliar surfaces, keep pulling the work up to check that the work is not getting felted to the work base by mistake.

Instructions

The process of adding embellishments using the needle felting technique is quite simple.

  1. Lay Out The Fabric: Needle felting will mesh different surfaces together, so before starting the project these need to be laid out. It is best to start with small projects such as adding a felt embellishment to some fabric. Most small items can just be laid on top of the base fabric, for more intricate or precise projects the surface decoration can be temporarily attached using water soluble materials or with a simple tacking stitch.
  2. Start Punching: Holding the felting needle or tool in the hand, punch the needle through the layers of fabric and fibers. Work on a small area at a time, until the layers start to mesh and then move onto the next area. Repeatedly work over the whole area until the layers are completely entangled and meshed together.

Tips for Successful Needle Felting

Although the technique of needle felting is very simple, there are a few tips that will help produce perfect results every time.

Ads by Google
Felting Fiber Variety
Fun & Colorful + Specialty Fibers Buy here: 38 yrs quality & value
halcyonyarn.com
Non-Woven Jute Felt
Good Quality, Good Price, On Time Satisfaction Guaranteed
jutegoods.com/felt.html


  • Very fibrous fabrics will work best. Mohair, for instance has plenty of loose fibers that will easily felt into other layers of fabric.
  • Further felt layers together by putting the finished piece into a washing machine on a hot wash. This will shrink and further felt the work. Wet felting will only work with wool or animal fibers as silks, cottons and other fibers will not shrink. Unusual textures can be achieve by mixing wools and other fibers as the wool will shrink and the non wool fibers will distort giving an unusual surface texture.
  • Use the right size needle for the project. Very coarse needles can split or tear fine fabrics.
  • The layers of fabrics and fibers become permanently bonded, so be certain of your design before starting.
  • Fibers from the top layers get pushed through the bottom layer, adding an interesting texture. The reverse of the fabric could be used as a design feature. This can be seen in the images below where the dark blue fibers are clearly seen on the rear of the work.
  • The felting process gives a firm finish. This slightly stiff finish has a different feel than if the layers had simply been stitched together.
  • Needle felting slightly distorts and pulls the fabrics out of shape. This is illustrated in the third image below.

Simple Needle Felting Projects

There are many free sewing patterns and projects on the Internet, including some great needle felting projects which are ideal for a beginner and are suitable for working by hand. These include:

  1. Needle Felt Phone Case - simple project that is ideal for a beginner .
  2. Needle Felt Apple - project to make a 3-D apple that would be a great embellishment for some sewing projects.
  3. Felt Heart Bouquet - lovely project with plenty of scope for variations.

Needle felting is an interesting technique for sewers to know and has many applications.

The copyright of the article How to Needle Felt in Sewing/Needlework is owned by Kate Pullen. Permission to republish How to Needle Felt in print or online must be granted by the author in writing.
Needle Felt Layers, Kate PullenNeedle Felt Layers
Fabric Needle Felted Together, Kate PullenFabric Needle Felted Together
Rear of Needle Felt, Kate PullenRear of Needle Felt
Yarn Felted to Fabric, Kate PullenYarn Felted to Fabric
Felting Needles , Kate PullenFelting Needles


Read more at Suite101: How to Needle Felt: Use a Dry Felting Technique to Add Embellishments to Projects http://sewingneedlework.suite101.com/article.cfm/how_to_needle_felt#ixzz0ft5lj9RX


abstract ice...taking picture of all the snow and ice can be fun if you are looking with an abstract eye! These pictures can later be printed and filed so that I have something fun and fresh to put into frames for winter or Christmas decoration that is subtle and white / silver.
How beautiful the world is around us....this shot is from Banchee's off-leash woods near our house. Have a great day, Amy